
How to Paint Front Door Without Removing It, Like a Pro
- Jul 7, 2025
- 9 min read
You can paint your front door without removing it. With the right prep, tape, tools, and a little patience, you can get a smooth, long-lasting finish while keeping your entryway secure and your project simple.
Let’s break it down step by step:
Prep is everything – Clean, sand, and tape with care to ensure adhesion and sharp lines.
Right tools matter – Use an angled brush and foam roller for smooth, drip-free coverage.
Choose the right paint – Water-based enamels dry fast and resist wear in Arizona’s heat.
Timing is key – Paint in the morning for faster dry time and fewer weather-related issues.
Don’t skip the details – Masking, brushing sequence, and even sheen all affect the final result.
Of course, even a small project like this can go sideways if you're not careful, and that’s where ProSmart Painting makes all the difference. We’ve helped hundreds of Arizona homeowners achieve pro-level results without ever removing their doors.
Keep reading to learn the exact process we use, so you can decide whether to DIY or let us handle it for you.
Can You Really Paint a Door Without Removing It?
Absolutely, and for many homeowners, this approach is far more convenient. Taking a door off its hinges introduces unnecessary complexity. Especially in older homes, realignment after removal can be a challenge. Frames settle over time, and even a slight shift can result in a door that sticks, scrapes, or doesn’t close properly. Painting in place avoids all of that, and when done correctly, it doesn’t compromise the quality of the finish.
Painting without removal also means you maintain home security during the project. This matters to families, especially in neighborhoods where leaving the front door wide open for hours isn’t an option. By choosing fast-drying products and starting early in the day, you can apply coats while keeping your entryway protected.
Surface condition still matters. If the door is in decent shape, no peeling paint or water damage, you can absolutely paint over it after proper prep. Even smooth finishes need to be scuffed so new paint can bond. Skipping prep because the door "looks fine" is a shortcut that typically leads to failure.
Tools & Materials You’ll Need to Paint In-Place
You don’t need a truckload of specialty gear to do this job well. Stick with high-quality essentials and avoid gimmicky shortcuts that often overpromise and underdeliver. ProSmart Painting always starts with the basics that consistently produce great results.
You'll need painter’s tape, a 220–320 grit sanding sponge, a tack cloth or microfiber cloth, a drop cloth or two, a quality angled brush, and a ¼-inch low-nap foam roller for smooth surfaces. Add a mild degreaser or soap for cleaning and you're ready to go.
Some optional tools make the job easier: a Handy Paint Pail keeps your brush clean and manageable, masking liquid works well for intricate glass panels, and frosted glass spray or Rub 'n Buff can enhance decorative details. We recommend choosing purpose-made products that match your door’s surface. And skip the “paint and primer in one” label hype, these products rarely deliver the adhesion or coverage they claim when applied over unknown finishes.
Thinning paint with water is another mistake we see far too often. While it may seem like a quick fix to stretch product, it compromises the paint’s integrity and longevity. We never water down paint, and we strongly recommend you don’t either.
Step-by-Step: How to Paint a Front Door Without Removing It

Step 1: Clean & Sand (Don’t Skip This)
The key to a successful paint job is the part most DIYers rush through. Cleaning and sanding the door sets the foundation for a long-lasting finish. Using a degreaser or TSP cleaner, scrub the surface thoroughly to remove oils, dirt, and residue that prevent paint from sticking. Once dry, sand the door using a 220-grit sponge to scuff up the finish. If the existing paint is glossy, this step is necessary. The goal is to give the new paint something to grip onto.
After sanding, use a tack cloth or a slightly damp microfiber towel to remove all dust from the surface. Lingering dust can mix into your paint and leave behind a gritty, uneven finish. Skipping this final wipe-down is one of the top reasons we get called to fix premature paint failure.
Step 2: Tape, Mask & Prep for Privacy
With your door clean and sanded, it’s time to mask. This is where attention to detail makes all the difference. Use painter’s tape to cover hinges, locks, door knockers, mail slots, and any glass inserts. Taping clean, tight edges is what separates a DIY-looking job from one that looks professionally done. Lay drop cloths inside and outside the door to protect flooring and threshold areas.
If you don’t have a storm door, securing your entry during drying can be tricky, but not impossible. Many homeowners in Phoenix and similar climates paint during the morning to maximize drying time. Choose a water-based enamel designed to dry quickly, and keep the door ajar with a plastic sheet or zip-wall temporarily taped into place. This keeps bugs and dust out while maintaining some privacy and security. If necessary, paint only one side per day to minimize exposure.
Proper masking also includes preparing for wind, pets, or neighborhood foot traffic. These variables can all affect the outcome if not planned for in advance. The bottom edge of the door especially needs protection from kicked-up dust or debris that can embed in wet paint.
Step 3: Apply Paint Like a Pro
Once your surface is prepped and taped, it’s time to paint. This step rewards patience and precision. Start with an angled brush to cut in around panels, raised trim, and any recessed edges. These are the areas where drips and brush marks like to appear, so take your time here. For the flat sections, switch to a ¼-inch low-nap foam roller. This will give you a smooth finish without the stipple effect common with thicker rollers.
Work in light, even coats rather than trying to cover everything in one pass. It’s better to apply two or three thin coats than to deal with sagging or drips caused by heavy application. Let each coat dry completely before applying the next, check your paint can for recommended drying times. High-quality water-based enamels typically require 1–2 hours between coats; oil-based products can take significantly longer.
To maintain a professional look, follow a consistent painting sequence: start with the edges, then paint the recessed panels, then move to the horizontal rails, followed by the vertical center strip, and finish with the outer vertical stiles. Always follow the natural grain or design pattern of the door.
Keep in mind that sheen matters. High-gloss paint might seem like a bold choice, but it tends to highlight every surface flaw and brush stroke, especially on older doors. A satin or semi-gloss finish provides a durable, elegant look while being far more forgiving on imperfections.
What’s the Best Paint for a Front Door That Stays On the Hinges?
When painting a door in place, product selection plays a major role in both durability and timing. Choose an exterior-grade enamel formulated for your door’s material, wood, fiberglass, or steel. These products are designed to hold up against UV exposure, fluctuating temperatures, and regular use.
Water-based enamels are often the best choice for homeowners who need to paint and close the door within a few hours. These paints dry faster, have fewer fumes, and clean up easily. For those with more flexibility and ventilation, oil-based enamels provide exceptional durability and depth of color, but require longer drying and curing times.
We often recommend Valspar Door & Trim Enamel or Sherwin-Williams All Surface Enamel. These products are formulated to resist cracking, fading, and peeling, even under the intense Arizona sun that tends to eat up lower-end paints in a matter of months.
For best results, use a combination of brush and roller. The brush gives you control on details and edges, while the roller evens out the surface. This approach blends the best of both tools and delivers a result that looks smooth and professional.
Common Mistakes to Avoid

Even with the best of intentions, there are common mistakes that can sabotage your paint job. Skipping surface prep is the fastest way to watch new paint fail prematurely. Dirt, oil, or old glossy finishes prevent proper adhesion, leading to bubbling and peeling within weeks.
Weather also plays a critical role. Painting during high humidity, extreme heat, or when winds are picking up can affect drying time and paint behavior. In hotter climates like ours, paint can start to dry before it’s even on the door, causing drag marks and uneven layers. That’s why we recommend painting in the morning when temperatures are stable and sunlight is indirect.
Another overlooked mistake is choosing the wrong sheen. Glossy finishes might look attractive on the sample swatch but they’re not forgiving. They expose brush marks and highlight surface flaws. Satin and semi-gloss finishes strike a better balance between durability and aesthetic smoothness.
Don’t underestimate the threshold area. If it’s not protected with plastic or a barrier, dirt and dust can settle into the bottom edge of the door while the paint is still wet. These small details add up to the difference between a good job and a great one.
When in doubt, check the manufacturer’s dry time and don’t close the door too soon. Water-based paints typically become tack-free within 1–2 hours but may take several more to fully cure. Rushing this step can leave you with smudges, fingerprints, or sticking, undoing all your hard work. Still need help? Contact us for more information and professional guidance.
Pros and Cons of Painting a Door Without Removing It
Painting your front door in place comes with advantages, but it also requires attention to detail.
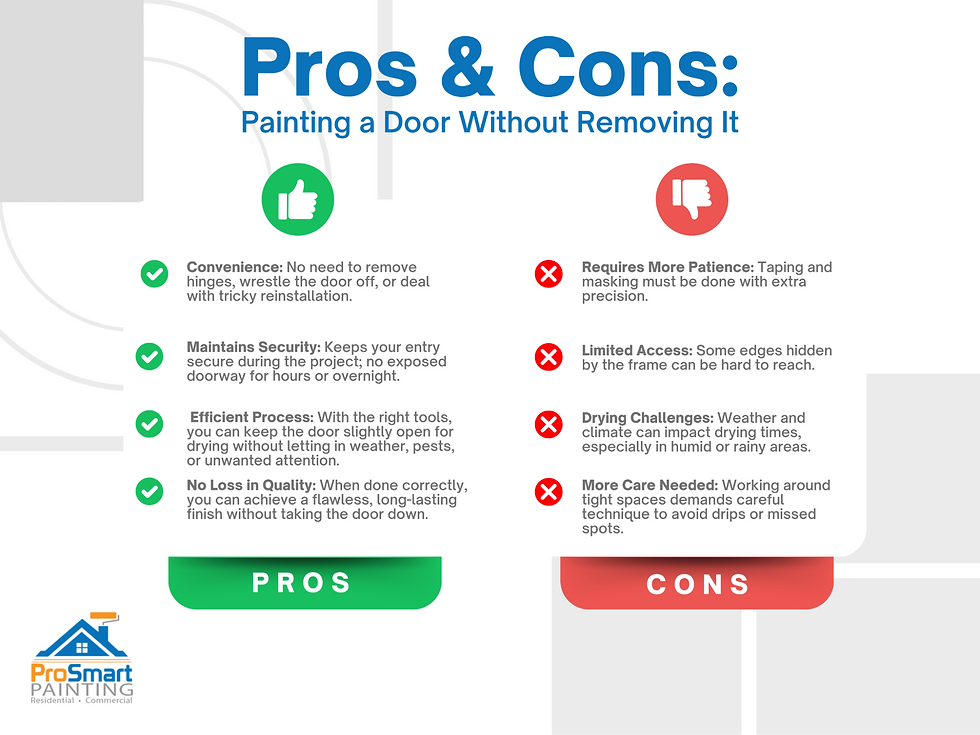
Pros
For most homeowners, the biggest advantage is convenience. There’s no need to wrestle with hinges, pull the door off, or worry about reinstallation issues. This is especially true for older homes where framing has shifted slightly over time. Once removed, a door might never hang quite the same way again.
Painting in place also keeps your home secure. You’re not leaving your entry exposed for hours or overnight, and with the right tools, you can work with the door open just enough to dry without inviting in unwanted elements, or attention.
If you follow the right process, there’s no compromise on quality. We’ve achieved flawless, long-lasting finishes on in-place doors using this exact method.
Cons
That said, this method demands patience and precision. Taping and masking must be done meticulously. Unlike painting on sawhorses where you can reach every angle, an in-place door has tight spaces you’ll need to navigate carefully.
Certain edges, especially those hidden by the frame, might be difficult to access. Drying can also be tricky depending on your climate. In humid or rainy regions, finding the right window of time can be a challenge.
But with proper prep, quality materials, and realistic expectations, these cons are manageable, and the benefits often outweigh the drawbacks.
Still Not Sure? Here’s When to Call ProSmart Instead

Not every door is a good candidate for an in-place paint job. If yours has multiple peeling layers, signs of rot or water damage, or potentially lead-based paint under older finishes, it’s safer to bring in a professional.
Sprayed finishes are another reason to call in help. While it is possible to mask an entire area for spraying, it’s time-consuming and unforgiving. In our experience, homeowners who attempt to spray without proper technique or equipment often end up with overspray, patchiness, or inconsistent layering.
If the idea of taping, sanding, and planning around weather feels overwhelming, or if you simply want the job done right the first time, ProSmart Painting can take it from here. We back every project with a no-exclusions warranty, don’t ask for payment until you’re 100% satisfied, and use premium products for every job. We’ve spent years building a brand built on trust, precision, and simplicity.
Painting your front door is the first impression your home gives the world. Whether you do it yourself or let us handle it, make sure it’s done right.
You Can Paint Like a Pro, But You Don’t Have To

Painting your front door without removing it is completely doable with the right prep and products. But even simple projects can go sideways when shortcuts are taken or key steps are missed. From poor adhesion to uneven finishes, we’ve seen it all, and fixed it all.
If you’re confident and ready to tackle it yourself, this guide gives you everything you need. But if you’d rather skip the hassle and guarantee a flawless, long-lasting result, ProSmart Painting is here to help.
We don’t ask for deposits. We don’t cut corners. We just deliver honest work and beautiful results you’ll be proud to come home to. Request your free estimate today. Let’s give your front door the finish it deserves.
Frequently Asked Questions (FAQ)
Can I paint my front door in cold weather?
It depends on the product. Most exterior paints require temperatures above 50°F to cure properly. Cold weather can extend drying times, increase the risk of bubbling, and affect how well the paint bonds. Always check your paint label and aim for mild, dry days whenever possible.
How long should I wait before cleaning a freshly painted door?
Wait at least 7 days before gently cleaning your door, and 14–30 days before using any cleaners or pressure. Even if the paint feels dry to the touch, it needs time to fully cure and harden, especially in high-touch areas like handles and edges.
Can I repaint a door that was previously painted with oil-based paint?
Yes, but surface prep is necessary. Oil-based paint requires either sanding or the use of a bonding primer before applying latex or water-based paint. Without proper adhesion, the new paint will likely peel. When in doubt, do a quick adhesion test or call a pro.
Is it okay to leave the hardware on while painting?
You can tape around it, but we strongly recommend removing handles, knockers, and locks for the cleanest result. Paint can build up around hardware edges and chip prematurely. If removal isn’t an option, tape very precisely and use a small artist’s brush around tight areas.
How do I know if my old door has lead-based paint?
Lead-based paint was used in homes built before 1978. If your home falls into that category and the door has multiple old layers, it’s best to have it tested before sanding. Lead-safe certified professionals, like ProSmart Painting, can help you assess and handle it properly.


Comments